Saturday, March 10, 2018
Creating your own Gelli printed paper...with Sarah
Hello crafty friends, one of my favorite crafty things to do is create my own backgrounds and patterned paper using the Gelli Plate. My post today will share some of my tips in using Memory Maze products to make it super easy!
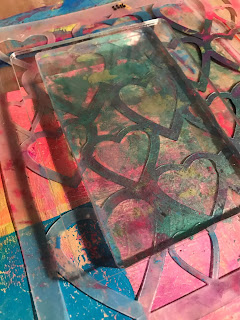
For this project I used my 3x5 inch Gelli plate (these are squishy gelatin based plates that make mono printing possible with the use of a press) to stamp onto a piece of cardstock to create my background page. The fantastic, large acrylic blocks from Memory Maze make gelli printing easy. As pictured below, the gelli plate clings to the 100x150mm block which enables handling it and stamping with it a breeze!
The paint is then applied to the plate using a brayer, stencil on top and then use your brayer again to run over the stencil to make an imprint in to the plate. The stencil shown here is the Sugar Skull. For the huge range of stencils, in various sizes, click here.
After removing the stencil, the block can easily be turned over to print on your page.
The other way to use the Memory Maze stencils with your gelli plate is to print throught them. As pictured below, place your stencil down on the page and press your painted gelli plate on top of it.
Here is the finished paper....still needs some more embellishing to complete a layout. Alternatively it could be cut up for card making or pocket scrapbooking cards. You can use your Memory Maze stencils to further add to the piece, along with chipboard pieces for a title to finish it off.
I hope you enjoyed this post and picked up some tips on using acrylic blocks for your projects. If you are interested in any of the Memory Maze products, be sure to contact your local craft store or Memory Maze for your local stockist where we can place our local sales reps in contact with them.
Subscribe to:
Post Comments (Atom)


No comments:
Post a Comment